Your final effort will be in standard three column format as in this diagram:

Designing a History newsletter
Publisher has a PageWizard for creating a newsletter, which you could use that if you wished, although some of its constructions are a little complicated. This section will show you how to create a three-column newsletter from scratch using:
|
Your final effort will be in standard three column format as in this diagram:
|
|
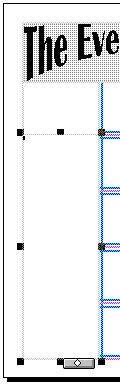
Notice that, at this stage, there is no content. The exercise concentrates on laying out the page. You could create your own content - in a word processor or a graphics package - and then use the File Import Picture and Text commands to place your stories and pictures. This activity assumes that you have introduced yourself to the basic features of Publisher by working through the other sections of the guide.
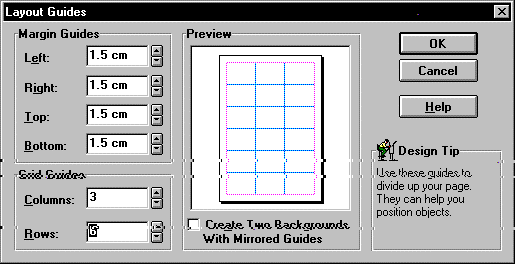
To help you lay out your newsletter you can add guides to the page. You can also employ a utility called ‘Snap to Guides’ which will make sure that your text and picture frames lock on to these guides when you place your frames.
|
Publisher will place the Layout Guides dialogue box on the screen:
|
|
|
This section will introduce some features of WordArt including applying shading frames. Your title might look like this: |
|
|
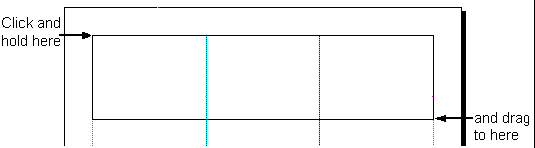
Drag out a frame from top left to bottom right of the first row |
|
- Publisher will display a dialogue box, ready for you to enter your text.
- Type: The Evening News
- Select
next to the Shape box which says Plain Text at the moment
- In some versions of Windows the button next to the Plain Text box will look like this:

Publisher will add a range of design options to the screen.
- Select

- This is Deflate (Bottom); it’s the fourth option in the fifth row.
- Select
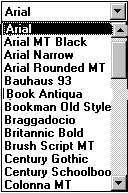
|
Publisher will drop down a list of fonts: |
|
|
Your title should look like this: |
|
To change the background to a WordArt frame you need to exit from WordArt.
|
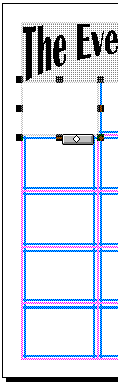
Your title should now look like this: |
|
You can complete the newsletter with a combination of text and picture frames. Remember you do not need to type in all your text. You can import it using the commands at the end of this reference section.
You might construct the page in the following manner:
|
Step 2: Adding the picture Select Drag out the frame across columns 2 and 3 |
|
 |
 |
|
|
|
Step 4: Adding the second story – headline and two columns |
|
|
|
|
Adding to your newsletter
Now you have created the front page of your the newsletter, all you need to do is to finish it off. The basic techniques for adding pages, text and pictures to your newsletter are summarised below.
Remember to save your newsletter at regular intervals.